Sunday, 11 November 2012

Ryurai Kai - WIP 2

With a rudimentary thought of colour scheme now figured out, the work on painting and slightly modifying has begun. I decided to make the grey parts a light blue, with a shading of royal blue. On top of this, with some masked off parts will be a JA grey. I also scribed in some additional lines in the leg armour - to better the separation on the masked parts and to serve as additional detail. Further colours are yet to be decided but I am leaning towards a beige, along with some stripy motif of some kind.

Took me forever it seems just to prime the gray parts. Once it was all primed (after several airbrush clogs and cleans) I had already lost half the day, and doing the masking and first undercoat of royal blue took up the rest. Lessons learned here - if your brush is consistently clogging, your not thinning it enough. Although I trusted the primer to be adequately thinned for my needs, it was a false presumption. I knew I bought a bottle of thinner from plamo UK for a reason.. Next time it will run smoother I hope.

Once the royal blue was completed, it left a bobbly, dirty residue, in which after some deliberation I decided to stick with as a "texture detail", some of course would grin with a sceptical comment about laziness, they would probably in all fairness be half right :)

Anyway, a video of the preceding described WIP below. Turned out quite nice in the end, and with the discovery of the additional Gatling cannon hidden in my spare parts bin, this Ryurai-Kai I have decided to title:

"Model 38 Ryurai-Kai: Suppression vanguard"

Now I need to hunt for some suitable decals :)

Thanks for watching and reading, more soon!


Sunday, 4 November 2012

Frame Arms: Ryurai Kai first impressions

Throughout the week I have been doing the usual cutting/sanding, getting the most laborious task out of the way in preparation for assembly this weekend. 

Now it is complete, I can summarise it as a pretty enjoyable build, with a few flaws and some cool extras. Lets start with the problems. The frame itself. Its loose and flimsy. It may be just my copy, but I had to unfortunately glue it in some places otherwise the legs would be coming off by a gentle breeze. Some parts were a little tough to fit, while other parts snapped on a little weirdly and sat at odd angles (the plates of additional armour on the front of the legs a prime example). 

Model 38 Type 1 Ryurai Kai Frame Arms


Now for the good stuff. It looks amazing. To my surprise it came with some alternative armour parts I was not expecting. This way, you can wither make it the mean-looking, heavily armoured artillery type or the more streamlined, infantry type. The benefit to this of course is that I can paint all the parts, and effectively get two models out of it! 

Will I get another one? Well, maybe. On looks alone it's totally up my street. On build, I enjoinder it but when parts started to drop off with no effort at all I could not help feeling disappointed  In balance though, it gets a thumbs up for sure. Coming up next time, let' see how well it paints :) 

Here's a vid of the assembly:


Tuesday, 30 October 2012

1/100 MG Zeta 2.0

Done! at last.. phew. My entry for the Gundam Eclipse summer war compo.


Zeta is done, plus some other things.

Hello! Yes, I finally completed the Zeta 2.0! Well, not entirely. Truthfully, I did not get around to doing everything I wanted to, and that was to paint the base up nice and add a little plastic man guiding the Zeta out from the footplate. As time would have it, I did not get it done. I shall make another post soon with some pics to peruse.

This means, luckily, I have met the deadline for the gundam eclipse summer war competition. Fingers crossed.. I entered the OOB intermediate category but I don'y hold out much for success, the other entries are marvellous.

Anyway, here is an update from the you tube, with a little look at my Gundam display cabinet:


Next up: Frame arms Ryu Rai Kai!


Saturday, 20 October 2012

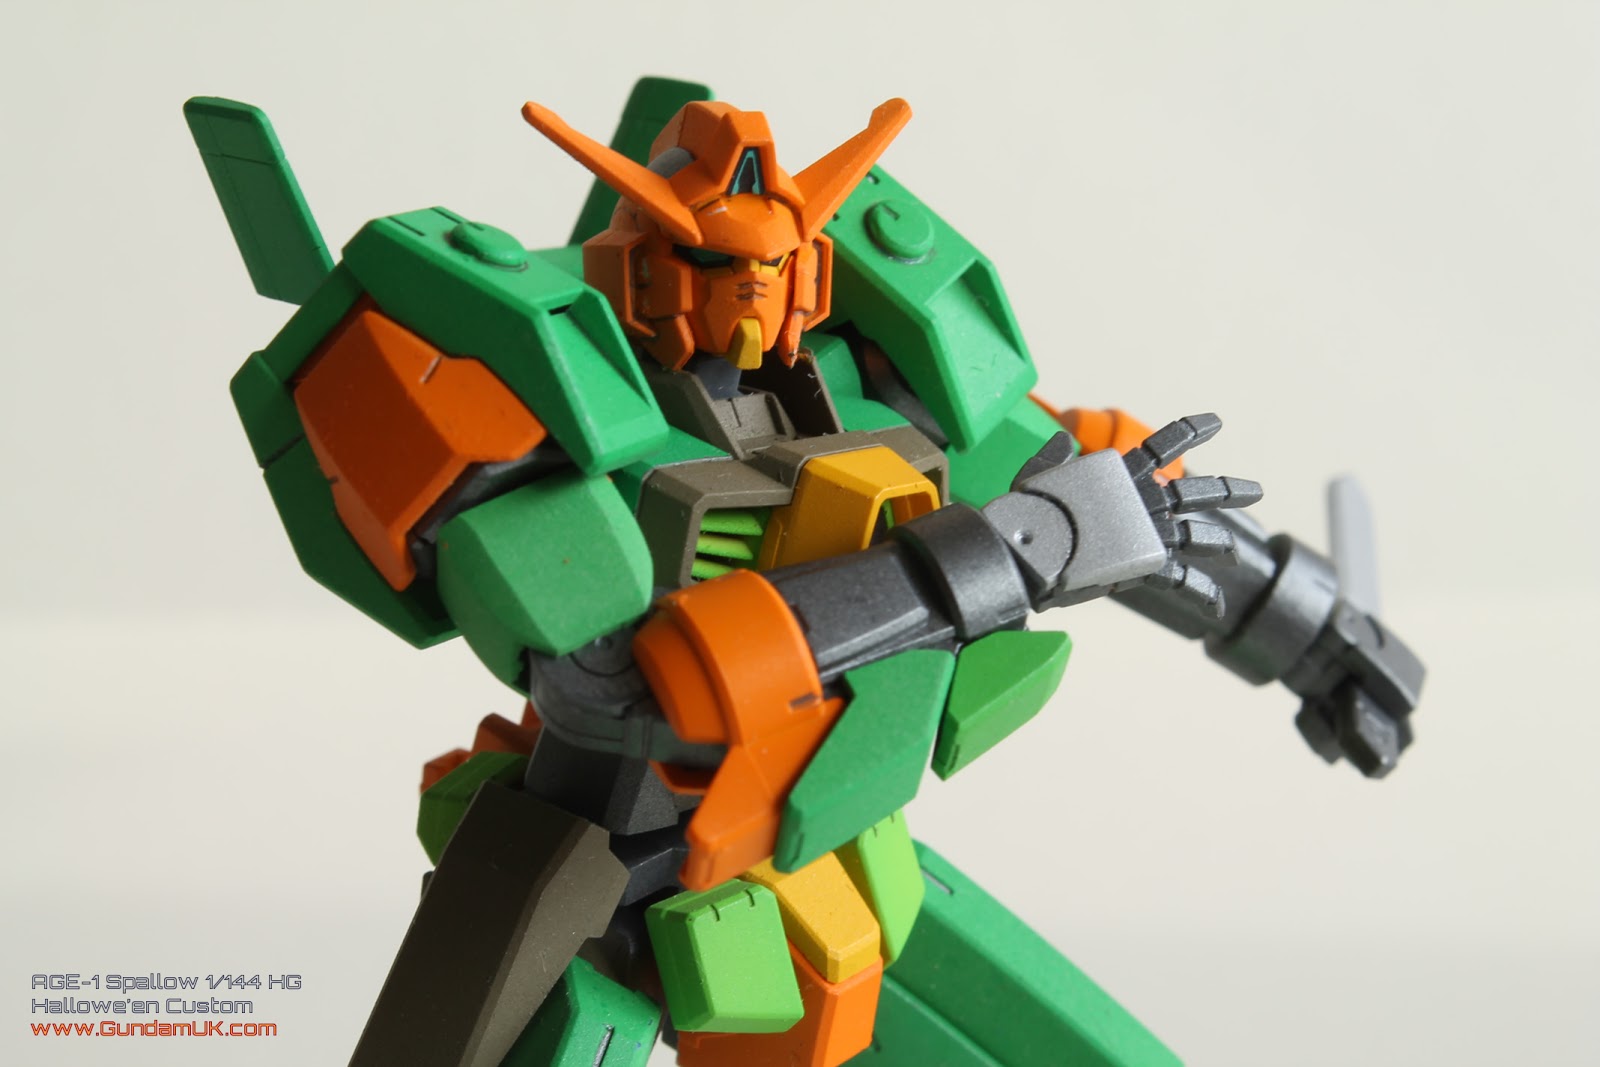
1/144 HG Age-1 Spallow: Halloween "jack 'o lantern" custom

Thanks hummingbird for the alternative name suggestion :) Yep, its done, its not perfect but its done. It was kind of an experiment in colour really as there (although it does not look like it) are 4 different shades of green on this one. The orange was just to make it "pop" and it kind of inadvertently turned into a hallowe'en thing when my wife commented on its colour combination.

Anyway, enough waffle, here's some ruddy pictures for you to look at for your own allotted time of viewing. I hope you find them acceptable to your brains.


Sunday, 14 October 2012

Age-1 Spallow WIP

Treating this as a bit of an experiment, as well as some much-needed practice when it comes to airbrushing, and slight modification. I added just 2 extra panel lines to this kit, along the shoulders, and also added a koto round bit to the rear of the shoulders. Looks a little "stuck on", perhaps I should have sunk it a little by drilling a hole.. still, what's done is done. 

Have completed all the base coating, looking mighty colourful. "Inner frame" is the usual gunmetal, the blue pats are now all the awesome looking Tamiya park green, white is now orange, a few yellow bits and a little bit of light green.

I will be masking off some of the park green parts, and adding some Khaki in. Shall also be masking off some of the gunmetal parts, and adding in silver. Its going to look like a psychedelic hippy death ninja by the time its done. In fact.. that'll be its custom name I think.

Age-1 Spallow: Psychedelic death ninja custom.

Yeah. Like that.

Frame parts, in the usual gunmetal. 
The blue parts, now park green.
Look at the colours, taste the toxic rainbow.

Saturday, 6 October 2012

Zeta MG WIP Part 5

A little progress, painted up the weapons now and have added a little detail into them. I must admit to being a little disappointed with this build.. I just wish I did not rush it as much as I have. However, I must persevere and continue onwards. Once these parts are complete, I'll be painting and weathering the base. I will then be assembling the parts was chunks (arms, legs,  backpack, torso, head, weapons, shield  and giving them all a top coat, then 2-3 layers of gloss before doing (and in some cases re-doing) the panel lining. Then its onto the decals.

Heres a pic of what I have done today:

A few tiny hand-painted details if you can see.. :)
On another note, Have today done a little update on you tube, just to show my new work area set-up really, and my new portable spray booth which is awesome :)


Later!